This Site
The technologies, tools, and decisions behind building this site.
Tags
Tech stack
- programming
- TypeScript
- React
- Next.js
- Tailwind CSS

This site is a place for me to showcase projects I've worked on, write about things that interest me, and mess around with new web technologies.
I don't particularly plan on working in frontend development professionally, but I don't want to be completely out of touch with it either.
That's why I built this site from "scratch": to learn more about modern web development practices and tools.
I also wanted a dedicated place to showcase my projects beyond pinning the repositories on GitHub.
The Basics
The site is built with Next.js, which is a React framework for building server-rendered and statically generated web applications.
I'm using the App Router so I can create dynamic routes for my posts and fetch the MDX content at build time using Next.js's static generation features.
I'm also using Next.js's @next/mdx package to handle MDX files as pages and content.
Markdown is processed via the remark and rehype ecosystems, which allow me to use plugins to extend functionality.
At the moment, I'm using remark-frontmatter to parse YAML frontmatter in my MDX files.
This lets me easily extract that data when rendering pages and use it to display the hero image, format the date, and list tags.
Another remark plugin I'm using is remark-gfm to support GitHub Flavored Markdown. It handles things like tables, task lists, and strikethroughs.
I'm also using rehype-pretty-code for syntax highlighting in code blocks.
All of this is stored on GitHub and deployed via Vercel for easy updates and hosting. Any time there is a change on the main branch, Vercel automatically rebuilds and redeploys the site.
Content Structure
The content for the site is stored in a content/posts directory, with each post as its own MDX file.
Each MDX file contains frontmatter metadata at the top, which is parsed and used to render the post. Here is an example of the frontmatter for one of my posts:
---
title: My Homelab
summary: Is it still a homelab if everything is routed through Oracle Cloud?
description: An in-progress homelab build exploring Oracle Cloud, Tailscale, and self-hosted services.
date: 2024-12-15
tags:
  - programming
  - server
type: project
hero: /content/posts/homelab/messy-desk-cropped.jpg
---
The frontmatter is processed using the remark-frontmatter plugin and converted into a JavaScript object that I can use in my React components.
Everything above the first actual text paragraph of this post is based on information from the frontmatter.
With this setup, I can easily add new posts by creating new MDX files in the content/posts directory, and the site will automatically pick them up and render them correctly when built.
This makes it easy to manage content and keep everything organized, and lets me have rich, interactive posts using MDX, while still having the benefits of static site generation for performance and SEO.
MDX React Components
This component takes a few props and renders a small “meter”.
I've wrapped it in one of my standard Card components to give it a border, and then added some padding for spacing.
// this is just a code block, more on them later
<Card className="p-6">
  <MDXMeter label="Build progress" value={62} tone="secondary" />
</Card>I created another component that tracks your scroll progress on the page and passes that value to the meter component to create a reading progress bar.
<ScrollTracker />Interactive Props Playground
This card is a client component; it has controls that update the props live.
<MDXMeter label="Reading progress" value={38} tone="accent" />You can change the label, value, and tone of the meter using the controls above and see the changes reflected in real time.
Server vs Client Components
I'd briefly mentioned how the MDX posts are rendered as static pages at build time using Next.js's server components, but with MDX, I can also include client components within my posts.
For example, the MDXMeterPlayground and ScrollTracker components used above are client components that allow for interactivity within the static MDX content.
This is pretty typical for App Router projects made of pages that are mostly server components but include some client components for interactivity.
However, I didn't realize I could do this with MDX the first time I tried it, and went down a whole rabbit hole of running an API route that could fetch the MDX files which were then rendered on the client side.
But that was a few years ago now.
This approach keeps the default rendering path static and server-side, while limiting client-side JavaScript to components that genuinely require interactivity.
Tailwind CSS
I'm trying out Tailwind CSS for the first time on this project.
Early on I was hand-picking colors in every component and drowning in class soup.
I fixed the color issue by defining a small palette for light and dark modes in the globals.css (primary, secondary, accent, neutrals) and letting Tailwind generate the various shades.
Everything now uses the palette and derived colors, so borders, backgrounds, and text stay consistent.
The next shift was leaning more heavily on components instead of constantly rewriting the same classes. Once I wrapped common patterns (cards, buttons, meters) into reusable pieces, the markup shrank and the styling became predictable instead of a wall of class names.
Code Block Highlighting
As this is a site that primarily exists for me to write about things that I've programmed, I wanted to have nice code blocks with syntax highlighting.
I'm already using rehype-pretty-code to handle syntax highlighting, but I also needed to provide some custom CSS to avoid it looking like this:
The syntax highlighting is fine, but the lack of line numbers, highlighted lines, and overall formatting made it look pretty bland and boxy.
Here is a code block with syntax highlighting, line numbers, and highlighted lines.
print("This is a code block with syntax highlighting.")
print("It is able to highlight specific lines.")
print("Like lines 1 to 2 in this example.")
print("Or even just a single line.")
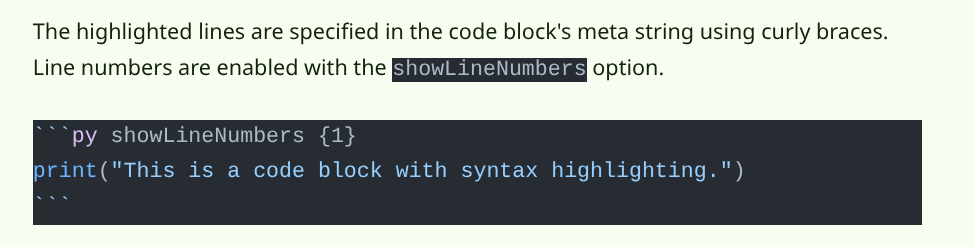
print("It can also show line numbers, as seen on the left.")This is achieved using the rehype-pretty-code plugin, which allows for extensive customization of how code blocks are rendered.
The highlighted lines are specified in the code block's meta string using curly braces.
Line numbers are enabled with the showLineNumbers option.
```py showLineNumbers {1}
1 print("This is a code block with syntax highlighting.")
```print("This is a code block with syntax highlighting.")I can customize the colors and styles of the code blocks using CSS variables defined in my global stylesheet.
For example, the highlighted line background color is set to a mix of the accent color and transparency so it stands out without being too harsh on the eyes.
I also have custom formatting for the inline code elements like this to make them visually distinct from regular text, and match the larger code blocks.
Extra Stuff
On top of all the stuff needed to get the site up and running, looking nice, and doing what I need, there are a few extra features I've added.
RSS Feed
I discovered RSS feeds while researching how other blogs and portfolio sites were built (Josh W Comeau was an inspiration for several parts of this site, and his book on developer portfolios was also a great resource) and thought it would be a nice addition to let people subscribe to my posts.
I used the feed package to generate an RSS feed at build time using the post metadata that was already being extracted from the MDX frontmatter.
The feed is available at https://cheyne.dev/rss.xml and can be subscribed to with any RSS reader.
Table of Contents
Before I ever really got into programming, I found it super interesting that a lot of websites can link directly to sections of a page using anchor links (e.g., https://example.com/page#section).
To add that to my posts, I made sure every heading automatically creates its own link by converting the generated HTML headings into anchor links with a custom component. Clicking a heading smoothly scrolls back to that spot, and I spent some extra time on some QOL stuff like gracefully replacing the current URL and ensuring stuff like opening links in a new tab work as expected.
With that in place, it was pretty straightforward to generate a table of contents that scrolls you to that location. I ended up separately parsing the MDX content at build time with a simple regex to extract the headings for the table of contents, and made a custom slug generator to ensure the links match up between the two locations.
The table of contents decides which entry to highlight based on which header is closest to and above the midpoint of the viewport. I found this gives the best sense of location within the document as you scroll, and it took some fiddling to get it feeling right. When near the top or the bottom of the page, there are some extra checks to ensure the first or last section is selected appropriately in case they are too small to be the one selected otherwise.
"Dev only" pages
There are a few pages that I added to check things like all the ways my colors can fit together, or a test page for the recolorable SVG icon I'm using for the site logo.
I didn't think they were worth making public, so I added a simple environment variable check to only allow access to them when running the site in development mode.
What's Next?
The basics of this site are pretty much where I want them as of the time of writing, but I plan on adding more.
To start, I'm planning on adding a page with a few browser-based tools I've made, and a space to put some of the games I've made that can be played with HTML5. I'd also like some persistent functionality for user interaction, like likes or polls with a database running on My Homelab.
Beyond that, I might look into setting up a CMS to make content management easier, and use ISR to allow for more frequent content updates without needing to rebuild the entire site.
Stay updated with my posts by subscribing to my RSS feed! If you want to see more about the code behind this site, check out the GitHub repository.